Load ULog and PX4 files in Python

PX4 is the leading software standard for drones and unmanned aerial vehicles (UAVs). PX4 provides a platform for controlling autonomous flight and navigation systems.

ULog is a binary log file format used by the PX4 autopilot system for recording flight data. It captures various flight parameters such as sensor readings, GPS data, battery status, and actuator outputs.

In Nominal, ULog data is used for post-flight analysis, debugging, and performance benchmarks. This guide uses flight logs from the PX4 community hub to demonstrate an automated pipeline for ingesting ULog files into Nominal.

Download flight logs

1dataset_repo_id = 'nominal-io/px4-ulog-quadrotor'
2dataset_filename = 'PX4-quadrotor-example-log.ulg'

For convenience, Nominal hosts sample test data on Hugging Face. To download the sample data for this guide, copy-paste the snippet below.

1from huggingface_hub import hf_hub_download
2
3dataset_path = hf_hub_download(
4 repo_id=f"{dataset_repo_id}",
5 filename=f"{dataset_filename}",
6 repo_type='dataset'
7)
8
9print(f"File saved to: {dataset_path}")

(Make sure to first install huggingface_hub with pip3 install huggingface_hub).

Convert ULog to CSV

Install pyulog: pip install pyulog.

It provides ulog2csv, which converts the PX4 ULog file to a folder of CSV logs:

1import subprocess
2ulog_path = dataset_path
3subprocess.run(["ulog2csv", ulog_path], capture_output=True, text=True)

List all CSV flight logs

Depending on the flight, the ULog-to-CSV converter will output ~50 CSV flight logs. To get an idea of what these log files are, we’ll print each of their file names.

1from pathlib import Path
2folder_path = Path(ulog_path).parent
3files = [file for file in folder_path.iterdir() if file.is_file()]
4
5for file in files:
6 print(file.name.strip('PX4-quadrotor-example-log'))

~50 CSV flight log names are printed.

_vehicle_land_detected_0.csv
_telemetry_status_0.csv
_vehicle_angular_velocity_0.csv
...
_vehicle_attitude_setpoint_0.csv

Inspect PX4 GPS log

Let’s inspect a single log file (..log_vehicle_gps_position_0.csv). Note that the timestamp column is common across log files and always in relative microseconds, meaning microseconds from the start of the flight or whenever the sensor began recording.

1import polars as pl
2from pathlib import Path
3
4full_path = folder_path / 'PX4-quadrotor-example-log_vehicle_gps_position_0.csv'
5
6df_gps = pl.read_csv(full_path)
7
8lat_normalized = pl.Series("lat_normalized", df_gps['lat']/10e6)
9lon_normalized = pl.Series("lon_normalized", df_gps['lon']/10e6)
10
11df_gps = df_gps.with_columns([
12 lat_normalized,
13 lon_normalized
14])
15
16df_gps.head().select(df_gps.columns[:6])
timestamptime_utc_useclatlonaltalt_ellipsoid
i64i64i64i64i64i64
96689774158193317099998947356611085190396423805471145
96890716158193317119998847356610985190398423779471119
97089357158193317139998847356610785190398423756471096
97289265158193317159998847356610585190398423687471028
97490058158193317179998847356610385190400423665471005

Let’s plot the recorded latitude vs longitude from the GPS sensor.

1import plotly.express as px
2import plotly.io as pio
3pio.templates.default = 'plotly_dark'
4
5fig = px.line(df_gps, x='lon_normalized', y='lat_normalized', width=500, height=500)
6
7fig.write_image('drone_gps_flight.svg')
8fig.show()

drone-gps-map

Upload a single PX4 GPS log file

Connect to Nominal

Concepts
  • Base URL: The URL through which the Nominal API is accessed (typically https://api.gov.nominal.io/api).
  • Workspace: A mechanism by which to isolate datasets; each user has one or more workspace, and data in one cannot be seen from another. Note that one token may access multiple workspaces.
  • Profile: A combination of base URL, API key, and workspace.

There are two primary ways of authenticating the Nominal Client. The first is to use a profile stored on disk, and the second is to use a token directly.

Run the following in a terminal and follow on-screen prompts to set up a connection profile:

$$ nom config profile add default
>
># Alternatively, if `nom` is missing from the path:
>$ python -m nominal config profile add default

Here, “default” can be any name chosen to represent this profile (reminder: a profile represents a base URL, API key, and workspace).

The profile will be stored in ~/.config/nominal/config.yml, and can then be used to create a client:

1from nominal.core import NominalClient
2
3client = NominalClient.from_profile("default")
4
5# Get details about the currently logged-in user to validate authentication
6# Will display an object like: `User(display_name='your_email@your_company.com', ...)`
7print(client.get_user())

If you have previously used nom to store credentials, prior to the availability of profiles, you will need to migrate your old configuration file (~/.nominal.yml) to the new format (~/.config/nominal/config.yml).

You can do this with the following command:

$nom config migrate
>
># Or, if `nom` is missing from your path:
>python -m nominal config migrate
1from nominal.core import NominalClient
2
3# Get an instance of the client using provided credentials
4client = NominalClient.from_token("<insert api key>")
5
6# Get details about the currently logged-in user to validate authentication
7# Will display an object like: `User(display_name='your_email@your_company.com', ...)`
8print(client.get_user())

NOTE: you should never share your Nominal API key with anyone. We therefore recommend that you not save it in your code and/or scripts.

  • If you trust the computer you are on, use nom to store the credential to disk.
  • Otherwise, use a password manager such as 1password or bitwarden to keep your token safe.
If you’re not sure whether your company has a Nominal tenant, please reach out to us.

Upload to Nominal

1from nominal.core import NominalClient
2
3client = NominalClient.from_profile("default")
4
5dataset = client.create_dataset(name = 'PX4 GPS Sensor data')
6
7dataset.add_tabular_data(
8 path = full_path,
9 timestamp_column = 'time_utc_usec',
10 timestamp_type = 'epoch_microseconds',
11)
12
13print('Uploaded dataset:', dataset.rid)

After upload, navigate to Nominal’s Datasets page (login required). You’ll see your CSV at the top!

Create a PX4 log lookup table

The script below creates a dataframe with each log file’s path, start time, and end time.

1import polars as pl
2from pathlib import Path
3import traceback
4
5log_names = []
6time_range_mins = []
7time_range_maxs = []
8log_path = []
9
10for file in files:
11 full_path = folder_path / file.name
12 try:
13 df_csv = pl.read_csv(full_path)
14 if 'timestamp' in df_csv.columns:
15 log_path.append(full_path)
16 log_names.append(file.name.strip('PX4-quadrotor-example-log'))
17 time_range_mins.append(df_csv['timestamp'].min())
18 time_range_maxs.append(df_csv['timestamp'].max())
19 except:
20 pass
21
22df_log_time_ranges = pl.DataFrame({
23 "log_files": log_names,
24 "min_micro_s": time_range_mins,
25 "max_micro_s": time_range_maxs,
26 "log_path": log_path
27})

Some log files don’t have valid start and end times - we’ll remove these rows from the dataframe.

1logs_to_filter = ["_mission_result_0.csv", "_sensor_correction_0.csv", "_sensor_selection_0.csv", "_mission_0.csv"]
2df_filtered_logs = df_log_time_ranges.filter(pl.col("log_files").is_in(logs_to_filter) == False)

Finally, we’ll plot all of the log start and end times to identify any outliers.

1fig = px.scatter(df_filtered_logs.drop('log_path'),
2 x = 'log_files',
3 y = ['min_micro_s', 'max_micro_s'],
4 height = 600,
5 log_y = True,
6 title = 'Flight log start and end times')
7
8fig.update_layout(showlegend=False)
9fig.update_layout(yaxis_title='Log time span (microseconds)')
10fig.write_image('flight_log_start_and_end_times.png')
11fig.show()

flight-log-start-and-end-times

Each log’s start and end times vary slightly but are generally uniform. No sensors started mid-flight or stopped long after landing.

Extract absolute flight time

To get an absolute flight start time, we’ll use the time_utc_usec column from the GPS sensor log file.

1from datetime import datetime, UTC
2
3def convert_micro_s_to_hours_minutes_seconds(micro_s):
4 total_seconds = micro_s // 1000 // 1000
5 hours = total_seconds // 3600
6 minutes = (total_seconds % 3600) // 60
7 seconds = total_seconds % 60
8 return hours, minutes, seconds
9
10timestamp_seconds = df_gps['time_utc_usec'].min() / 1_000_000
11dt_flight_start = datetime.fromtimestamp(timestamp_seconds, UTC)
12dt_flight_duration_micro_s = df_filtered_logs['max_micro_s'].max() - df_filtered_logs['min_micro_s'].min()
13hours, minutes, seconds = convert_micro_s_to_hours_minutes_seconds(dt_flight_duration_micro_s)
14
15print(f"Flight start time in UTC: {dt_flight_start}")
16print(f"Flight duration: {hours}h {minutes}m {seconds}s")
1Flight start time in UTC: 2020-02-17 09:52:50.999989+00:00
2Flight duration: 0h 2m 0s

Create PX4 log run

In Nominal, Runs are containers of multimodal test data - including Datasets, Videos, Logs, and database connections.

To see your organization’s latest Runs, head over to the Runs page

We’ll use the create_run() routine to create a Run with the flight start and end times that we identified above.

1from nominal.core import NominalClient
2from datetime import timedelta
3
4client = NominalClient.from_profile("default")
5
6quadrotor_run = client.create_run(
7 name = 'PX4 single quadrotor flight',
8 start = dt_flight_start,
9 end = dt_flight_start + timedelta(microseconds=dt_flight_duration_ms),
10 description = 'https://logs.px4.io/plot_app?log=89b87d6f-d286-4703-b36b-573191a907f1',
11)

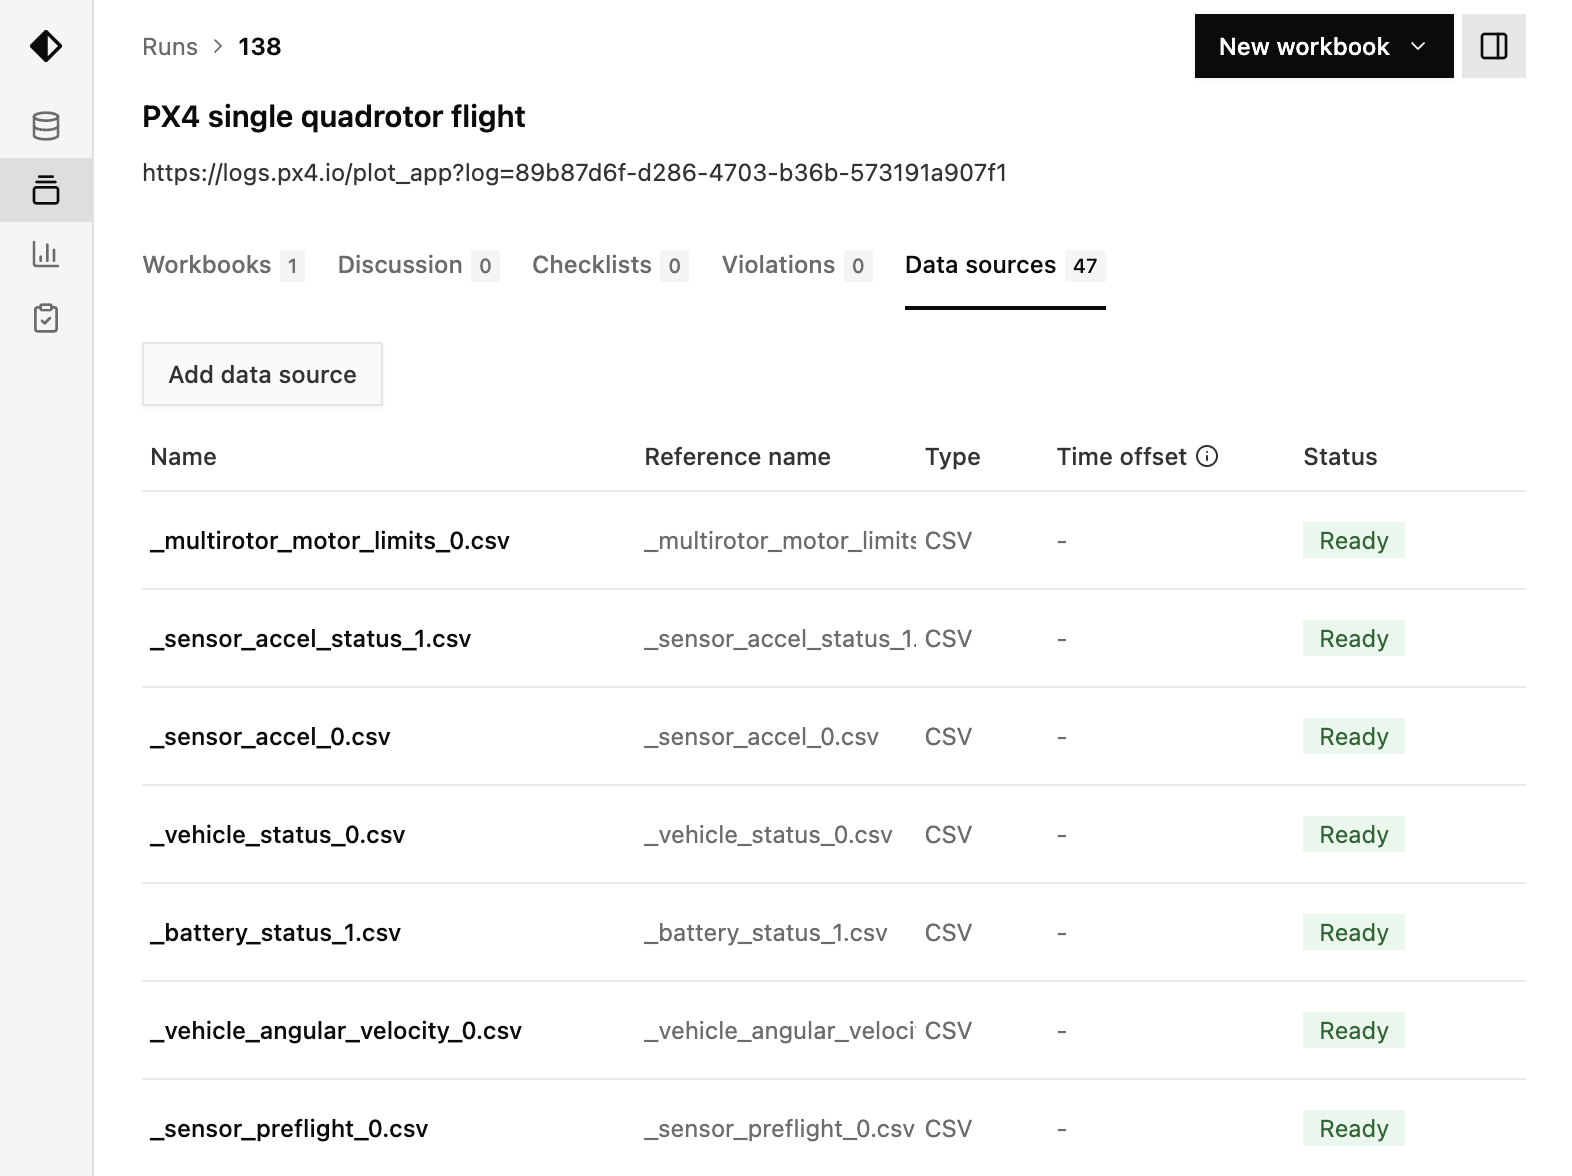
If you head over to the Runs page on Nominal (login required), you’ll see the “PX4 single quadrotor flight” at the top:

nominal-runs-page

Bulk upload all PX4 logs

To upload all ~50 PX4 log files to the quadrotor run, we’ll iterate through the lookup table that we created and validated above.

There may multiple CSV files associated with each log category, e.g. _battery_status_0.csv and _battery_status_1.csv. We combine these into a single battery_status.csv file.

For each category, we create a dataset using client.create_dataset, and then use Dataset.add_tabular_data() to upload related CSV files. Then, we’ll use Run.add_dataset() to associate the dataset with the run.

1import traceback
2
3log_files = {}
4
5# Add logs to the dataset
6for row in df_filtered_logs.iter_rows():
7 file_name = row[0]
8 full_path = row[3]
9 df_csv = pl.read_csv(full_path)
10 if 'timestamp' in df_csv.columns:
11 try:
12 ref_name = '-'.join(file_name.split('_')[1:-1])
13 csv_name = f'{ref_name}.csv'
14
15 if ref_name in log_files:{
16 dataset = log_files[ref_name]
17 else:
18 print('\nCreating dataset:', csv_name)
19 dataset = client.create_dataset(name=csv_name)
20 log_files[ref_name] = dataset
21
22 print(f'Adding `{file_name}` to dataset `{csv_name}`')
23 dataset.add_tabular_data(
24 path=full_path,
25 timestamp_column = 'timestamp',
26 timestamp_type = 'epoch_microseconds'
27 )
28 except:
29 print('Error uploading: ', file_name)
30 print(traceback.format_exc())
31
32print()
33for ref_name, dataset in log_files.items():
34 print(f'Adding dataset `{dataset.name}` to run with ref_name `{ref_name}`')
35 quadrotor_run.add_dataset(
36 ref_name=ref_name,
37 dataset=dataset
38 )
...
Creating dataset: actuator-outputs.csv
Adding `_actuator_outputs_0.csv` to dataset `actuator-outputs.csv`
Creating dataset: battery-status.csv
Adding `_battery_status_0.csv` to dataset `battery-status.csv`
Adding `_battery_status_1.csv` to dataset `battery-status.csv`
...
Adding dataset `actuator-outputs.csv` to run with ref_name `actuator-outputs`
Adding dataset `battery-status.csv` to run with ref_name `battery-status`

On Nominal, navigate from the Runs page to “PX4 single quadrotor flight”. In the “Data scopes” tab, you should see ~40 datasets.

datasets-in-runs

Create a workbook

Now that all of the flight data is organized as a test Run on Nominal, it can be collaboratively visualized, analyzed, and benchmarked as a reference for future flights. See Creating a workbook for more information.

px4-data-dashboard

Appendix

Inspect ULog metadata

Run the ulog_info command to extract high-level log file parameters such as the flight computer RTOS and version.

1import subprocess
2result = subprocess.run(["ulog_info", "-v", ulog_path], capture_output=True, text=True)
3print(result.stdout)
Logging start time: 0:01:36, duration: 0:13:39
No Dropouts
Info Messages:
sys_mcu: STM32F76xxx, rev. Z
sys_name: PX4
sys_os_name: NuttX
...